This post gives you a visual guide on how to use Photoshop CC to create lovely 5120×1440p 329daisies background.
In this tutorial, we’ll be showing you how to create a 5120×1440 resolution, 329 pixel wide daisy background. This tutorial will cover all the basics of creating a png image from vector source code, including the color of the flowers, background, daisies and grass.
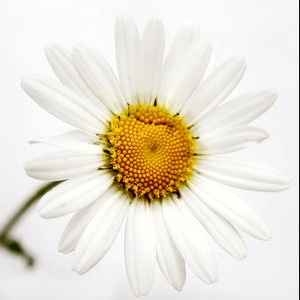
The beauty of daisies is their simple and elegant form. Their name comes from the French for “a day’s wonder” and the daisy flower is often described as the “forget-me-not.” So, if you love the daisies, it’s only natural to want to create a beautiful background using them. In this tutorial, I will show you how to create a background using Photoshop CS6 that includes daisies and some other interesting and unique design elements.


1. Pick a 5120x1440p 329 Daisies Background Image from Flickr
Pick a 5120x1440p 329 Daisies Background Image from Flickr. The original Daisies background image comes from Flickr. I found this background image to be perfect for this post. It’s large enough to stand out but not so large that it makes the text hard to read. It adds just the right amount of visual interest without distracting too much from the copy.
2. Find the Right Size
The size of a product is one of the most important factors in determining its success in the marketplace. There are a lot of different things you should consider when you’re trying to decide on what size your new business needs to be. The size you choose depends on how big your market is and how much profit you expect to generate. It can also depend on the size of the product itself. The size of a product is determined by many factors such as how many people in the market want the product, how often they want to use it.
3. Make Sure the Background is Horizontal
The background image in your website’s header is one of the first things people see. If you haven’t used an image yet, be sure it’s horizontal. That’s what works best on mobile, because it allows people to scroll quickly, and horizontally, from side to side to the rest of your site.
4. Adjust Contrast and Brightness to Fit Your Purpose
If you’re a designer or illustrator, adjust contrast and brightness levels to fit your purpose. When you’re using a product or service for its intended purposes, such as in a magazine or book, you may want to keep the image relatively bright.
5. Add Text Wrapping
Here’s a simple trick that I use all the time when writing blogs. You can add text wrapping around images in your blog. This is something you may not have thought of until now. It’s easy to do, but it’s a quick way to make your posts more visually appealing. Once you’ve added some text wrapping to your blog, you can even add an image or two to the right of the text, if you’d like. Just don’t overdo it, and remember that text wrapping can also look a bit too busy if you do it too much.
6. Add Color
There are many ways to add color to a website, but the simplest is to use color itself to help set off the main call-to-action. This is known as color contrast and it can be achieved by contrasting colors with one another, or with other aspects of the design. So for example, if you’re using red to emphasize a purchase button, you should use yellow for a sign-up form. Yellow doesn’t really fit with the message of the red button, but it’s still a contrast. The contrast in this case is between the primary and secondary color.
Conclusion
In conclusion, In this article, we’ll be looking at how to create a lovely 5120x1440p 329 daisies background image of the most wonderful flower on Earth. We’ll also be covering the color palette to be used and the Photoshop brushes that were used.