You should properly maintain your motorcycle tail lights to ensure they are as effective as possible. You can perform various routine maintenance tasks to keep them in good working condition. Ensure that you maintain their alignment by checking and cleaning the lenses. When in doubt, change the bulb. Here are a few tips on how to keep the light shining correctly:
Check your vehicle’s repair manual for specific information on how to test these
First, check the headlight lens. Many headlights have a lens made of clear plastic, and clear lenses have different light distribution characteristics. Damaged lenses will be less visible than those with darker tints. Damaged lenses can also be the result of multiple scratches. A cracked diffusion disc or multiple scratches from gravel impact can impair the light distribution. It also affects the critical cut-off line, resulting in less visible light.
A misaligned motorcycle headlight can affect the visibility of your ride. If you can’t see the headlights while riding, your bike might have a wiring problem. The problem may be related to a bad ground connection. To test your headlights, you can put a testing probe between the headlights’ positive and negative terminals. If the lights still aren’t working, the voltage is the problem.


Checking the headlight’s lenses
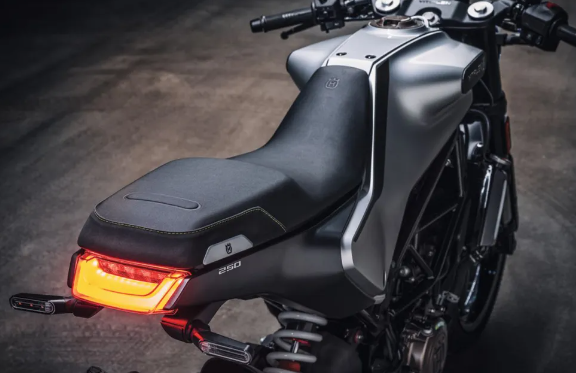
The motorcycle’s rear lamp must be red or amber and mounted near the rear. It must be secure and make a secure electrical connection. The lenses should be clear or red to the front and or amber to the rear. The lenses may have one or more cracks, but these must not cause off-color light to be projected. The motorcycle should also have a halogen bulb approved for use in police motorcycle headlamps.
If the lens is cracked, you need to replace the whole assembly. For this, you need to remove the lens and the housing. Replace it with a new one. Ensure that the new one fits the same dimensions as the old one. Once the new lens fits over the light bulb assembly, screw it back into place. You will need a screwdriver to unscrew the housing and replace the old lens.
Cleaning the headlight’s lenses
To clean the headlight’s lenses, start by removing the yellow plastic coating. This layer is caused by oxidation; you can remove it with sandpaper. Then, use a compound to apply UV protection to the lenses. Follow these steps to restore the lens. This step will require around an hour. This step is more difficult than cleaning the headlight’s lenses with soapy water. However, it will give you a better result than using soap.
After cleaning the headlight, you should use a mild cleanser to remove debris. You can purchase a headlight restoration kit if you don’t want to use the one that came with your motorbike. Another great option is baking soda and water, and the baking soda will remove dirt and gunk. Combine the two ingredients and mix thoroughly. Leave the paste on the lens for a few minutes before wiping it off.
Changing the bulb
Changing the bulb on your motorcycle tail lights should be a fairly easy job; if you are driving your motorcycle at night, it is necessary. Remove the rubber boot and loosen the sprung wire clip on the headlight. Next, remove the bulb by pressing firmly on the base, and be careful not to grab the glass as you might break it. Lastly, place the old bulb in a tray to catch the screws used in removing the bulb.
You can identify the bulb by checking the other lights. If there is one missing bulb, it is most likely that one of the bulbs needs replacing.
Before replacing the bulb, you should know how the light circuits of your motorcycle work. The circuits in the headlight module are made to carry specific amounts of electricity and power. If you select the wrong wattage, your motorcycle tail lights will not function. To avoid this problem, check the fuses in your motorcycle headlight. In case one is blown, you’ll need to replace the relay.
You can also choose a different bulb type at http://purposebuiltmoto.com/product-category/tail-lights/ to replace the old one. Some manufacturers use halogen bulbs, while others use LEDs. Halogens use a gas mix of Xenon and halogen, and some claim that the light output is twice as bright as that of LEDs. For older bikes, you will need to buy a conversion kit, which is expensive and more complicated than changing the bulb.
Halogen bulbs are the most common kind of light in motorcycles. While they are great for visibility and efficiency, they have a limited life span. To ensure the safety of other road users, you should have spare bulbs available and ready to go. Fortunately, most motorcycles are equipped with halogen bulbs. If you have to change a bulb, make sure you buy a replacement compatible with your motorcycle.